Introduction
Setup LAN/Network ConfigurationEdit Custom HTML (under Home Page)
Requires administration privileges.
Implemented since 2013-02-01 (may require firmware update).
Requires at least 16MB of flash memory. If you have an older NetMeter with insufficient memory to support custom HTML, you can have your NetMeter(s) upgraded for free. Note that, in doing so, all existing memory contents and data will be lost. Contact us for more details.
Overview
The NetMeter can host up to 4 custom HTML pages. The pages can be accessed as:
Custom page 0: http://netmeter/file.htm
Custom page 1: http://netmeter/file.htm?region=html1
Custom page 2: http://netmeter/file.htm?region=html2
Custom page 3: http://netmeter/file.htm?region=html3
Replace "netmeter" with the name or IP address of your specific NetMeter(s).
Pages may not exceed 32KB in size.
Creating Custom HTML
Navigate to:
SetupLAN/Network ConfigurationEdit Custom HTML (under Home Page)
This should bring up the HTML editing window (which will initially be blank):
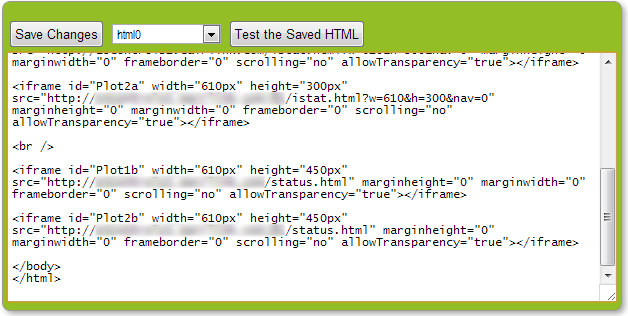
Type in or "paste" the custom HTML and then click Save Changes to store it into the NetMeter's memory.
To try out the saved HTML, click Test the Saved HTML (make sure you save your changes before testing).
Example Custom HTML
The possibilities for custom HTML are virtually unlimited. However a simple example will be given.
A typical way to use custom HTML is to embed widgets inside "I-frames". Multiple widgets from either a single NetMeter or multiple NetMeter's may be used on a single custom page allowing data from multiple NetMeters to be visually aggregated.
Here is the source code for a simple example:
<!DOCTYPE html PUBLIC "-//W3C//DTD XHTML 1.0 Transitional//EN" "http://www.w3.org/TR/xhtml1/DTD/xhtml1-transitional.dtd">
<html xmlns="http://www.w3.org/1999/xhtml">
<head>
<meta http-equiv="Content-Type" content="text/html; charset=utf-8" />
<title>Simple Dashboard</title>
</head>

<body>
<div style="text-align:center; font-family:Verdana, Geneva, sans-serif; font-size:24px; font-weight:bold">Simple Dashboard</div>


<iframe width="500px" height="200px" src="http://netmeter2/iframe.html?m=f0a" marginheight="0" marginwidth="0" frameborder="0" scrolling="no" allowTransparency="true"></iframe>

<iframe width="500px" height="200px" src="http://netmeter/iframe.html?m=f0a" marginheight="0" marginwidth="0" frameborder="0" scrolling="no" allowTransparency="true"></iframe>

</body>
</html>
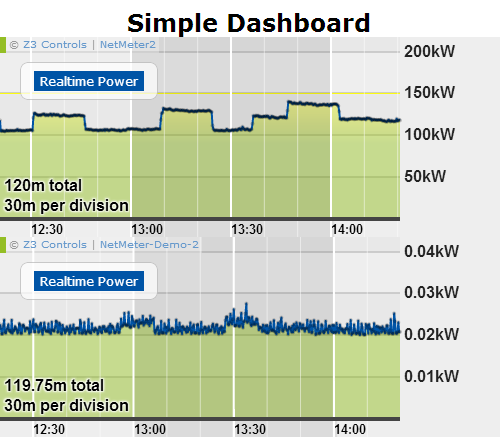
The Code is mostly a boilerplate HTML document. The two I-frames simply reference special HTML widgets for each of the NetMeters and those widgets create the real-time graphs pictured below.
You can try out the code as follows:
- Copy and paste the above HTML code into the HTML editing window of one of your NetMeters
- Change "netmeter" and "netmeter2" to the net name or IP address of two NetMeters on your network
- save it, and test it
The resulting HTML looks something like this:
Try changing the "src" link to display other widgets as described at widgets help page.
Creating a Custom Home Page
One of the user customized web pages may be used as the default homepage.
Go to SetupLAN/Network Configuration and scroll down to the Home Page section:
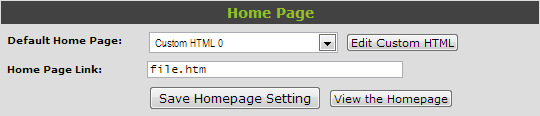
Edit the custom HTML as described above. Once the custom HTML is suitable, then go back to SetupLAN/Network Configuration and select the appropriate HTML page under "Default Home Page".
If you accidentally mis-configure the default homepage then you can return to the setup page by manually typing in the link such as:
http://netmeter/setup.html (replace "netmeter" with the IP address or net name for your specific NetMeter)
For learning about writing HTML, consult one of the many online learning resources.